
1. 使用工具和学习路径
中文官网地址: https://cn.vuejs.org/v2/guide/
使用工具 Hbuilder X
2. 基础知识
- 常用指令
- v-bind
- v-mode
- v-for
<dev id=appx>
<ul>
  <li v-for="item in items">
      {{ itme.title }}
  </li>
</ul>
</dev>
<script>
var vm = new Vue({
el:"#appx",
data:{
  items: [
      {"title": "张三"},
      {"title": "李四"},
      {"title": "王五"},
  ]
})
</script>
- v-if
- 单项数据绑定和双向数据绑定 xxxxx
Vue()子类的使用
对象实例以及对象实例的调用
<script>
var vm = new Vue({
  el:"#appxxx",
  data:{
      title:"我vuejs学习",
      url:"http://www.baidu.com"
  }
})
// vm.$el 就相当于 document.getElementById("appxxx")
//样式设置为红色
vm.$.el.style.color = "red";
</script>
vue.js 文件引用
<!DOCTYPE html>
<html>
<head>
<meta charset="utf-8">
<title></title>
<script src="vue.js" type="text/javascript" charset="utf-8"></script>
</head>
<body>
  <div id="app">
    {{ message }} {{name}}
  </div>

  <script type="text/javascript">
  var app = new Vue({
      el: '#app',
      data: {
          message: 'Hello Vue!',
          name : "Vue"
      }
  });
  </script>
</body>
</html>
- 数据和方法(用实例的方法 $watch 观察变量值改变前后情况 )
<!DOCTYPE html>
<html>
<head>
<meta charset="utf-8">
<title></title>
<script src="vue.js" type="text/javascript" charset="utf-8"></script>
</head>
<body>
<div id="app">
  {{a}}
</div>
<script type="text/javascript">
var data = { a : 1 };
var vm = new Vue({
  el   : "#app",
  data : data
});
vm.$watch('a', function(newVal, oldVal){
  console.log(newVal, oldVal);
})
vm.$data.a = "test...."
</script>
</body>
</html>
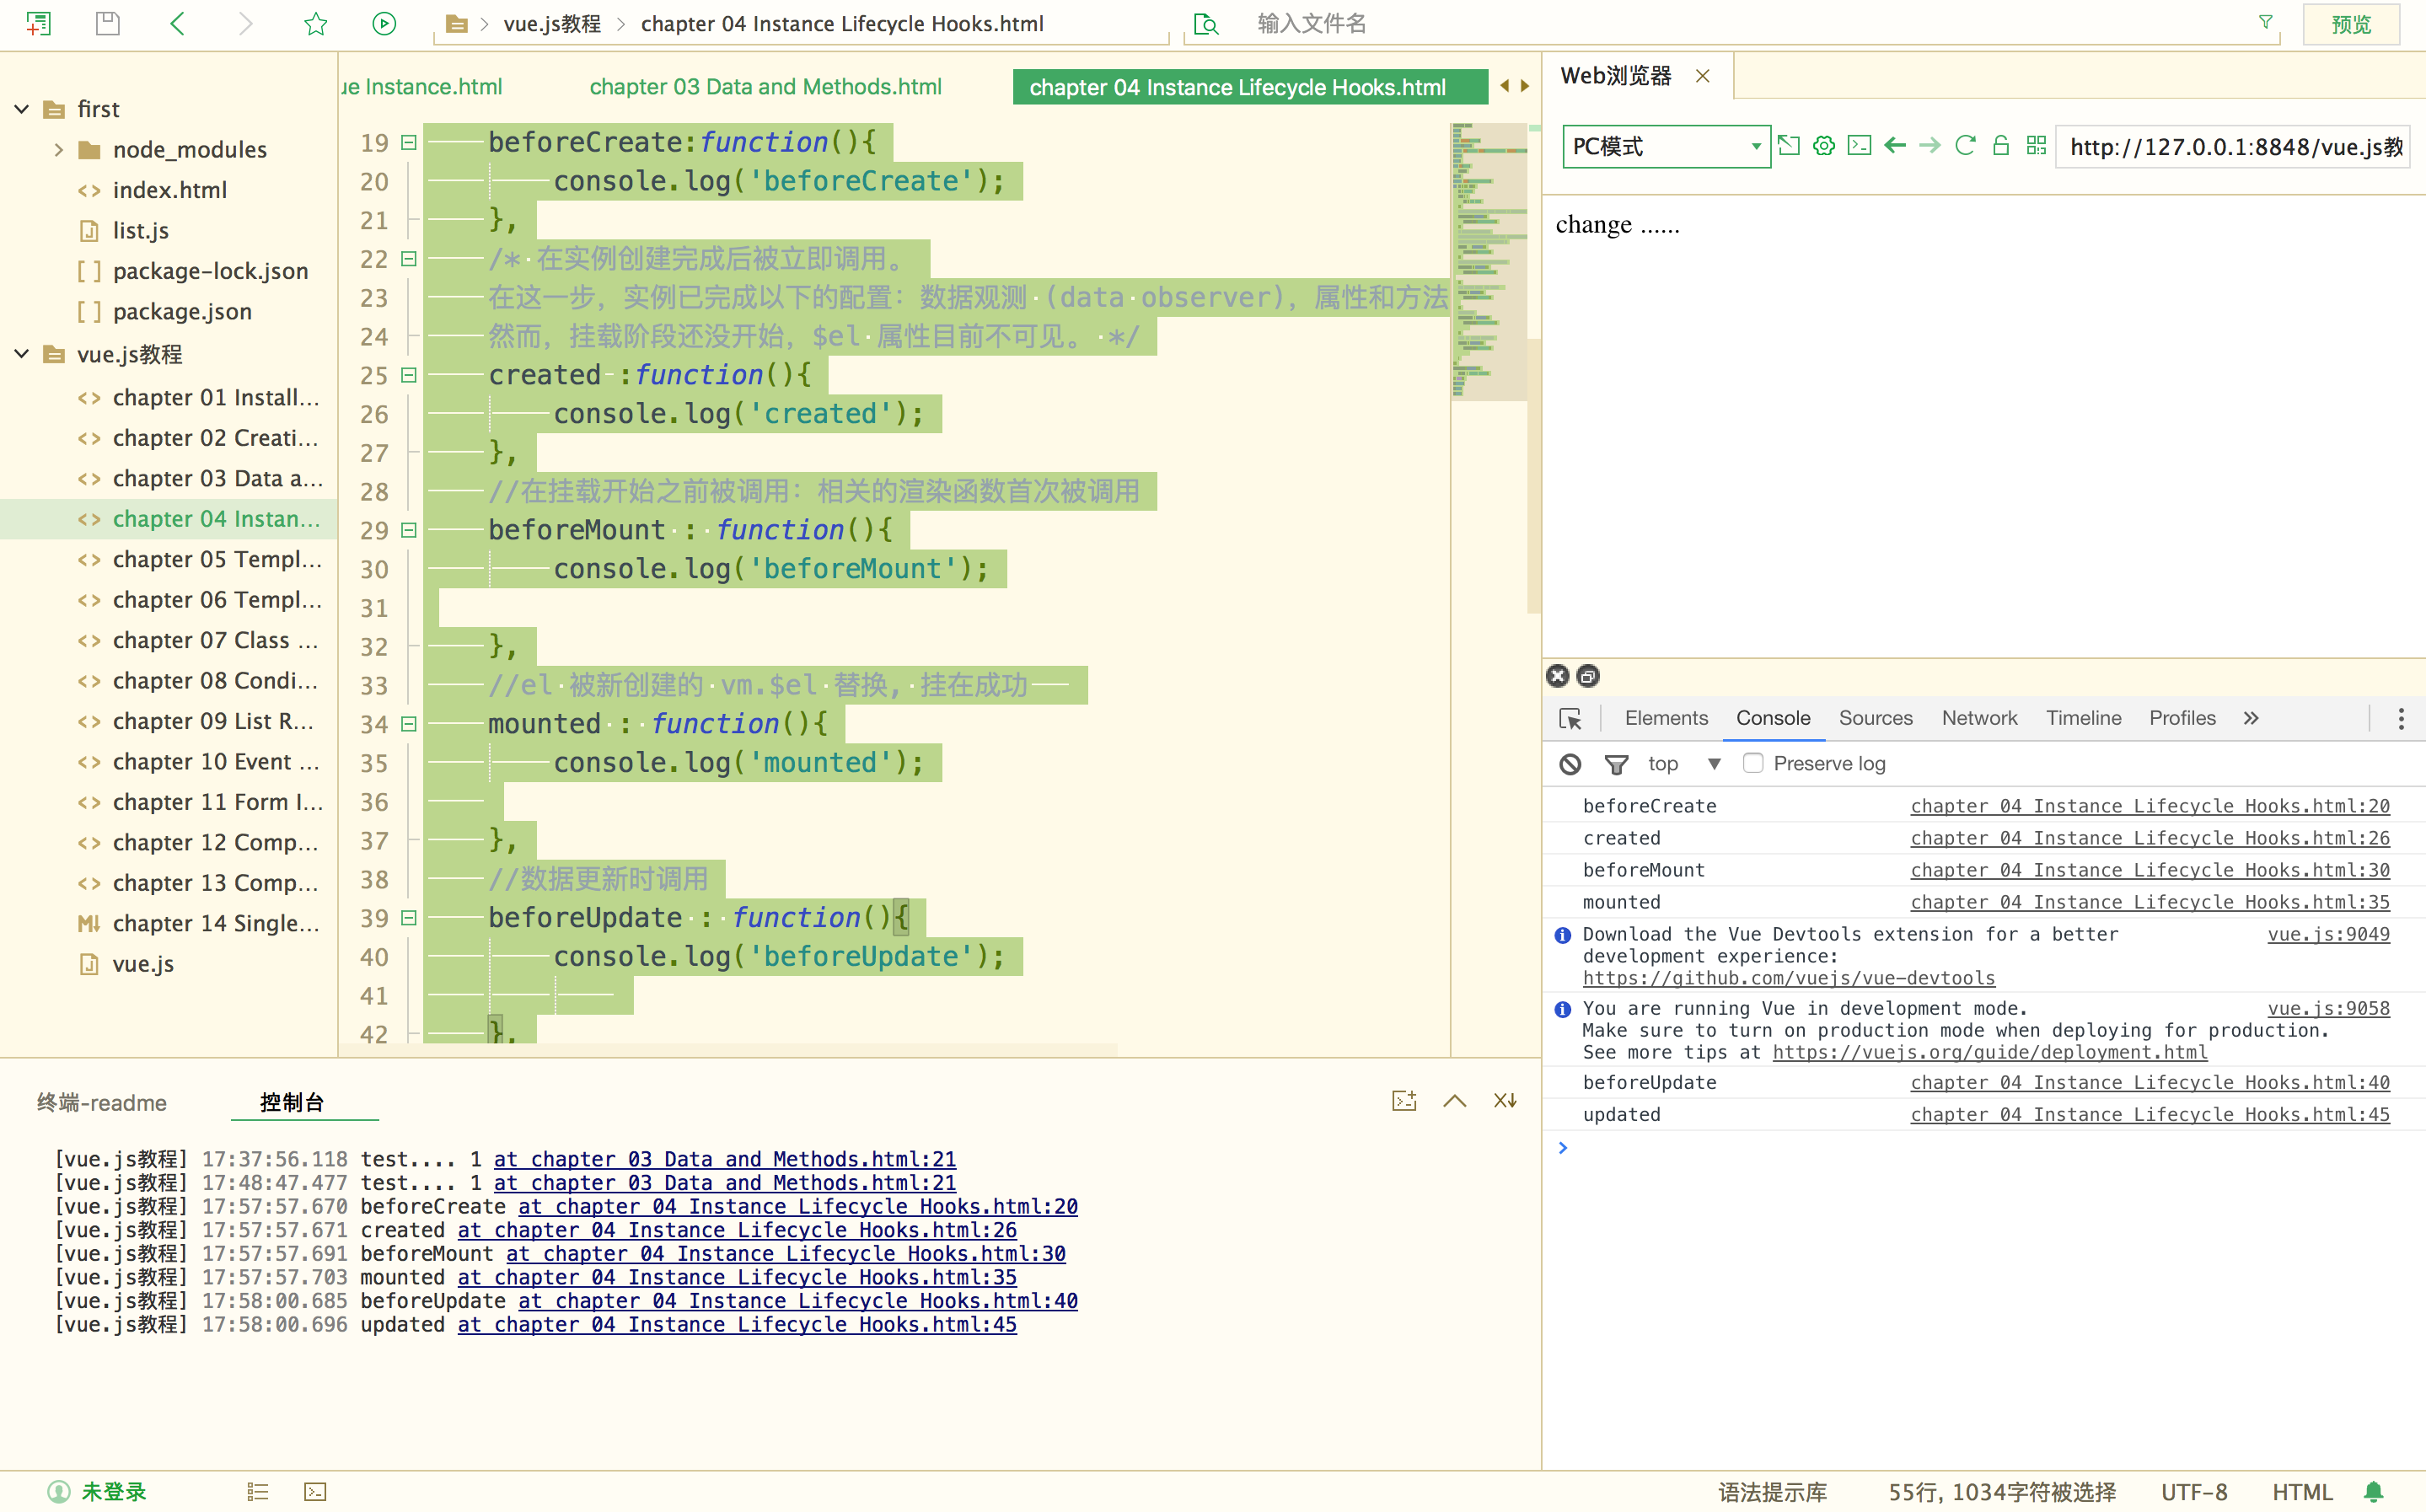
实例生命周期
<!DOCTYPE html>
<html>
<head>
<meta charset="utf-8">
<title></title>
<script src="vue.js" type="text/javascript" charset="utf-8"></script>
</head>
<body>
<div id="app">
  {{msg}}
</div>
<script type="text/javascript">
var vm = new Vue({
  el : "#app",
  data : {
      msg : "hi vue",
  },
  //在实例初始化之后,数据观测 (data observer) 和 event/watcher 事件配置之前被调用。
  beforeCreate:function(){
      console.log('beforeCreate');
  },
  /* 在实例创建完成后被立即调用。
  在这一步,实例已完成以下的配置:数据观测 (data observer),属性和方法的运算,watch/event 事件回调。
  然而,挂载阶段还没开始,$el 属性目前不可见。 */
  created :function(){
      console.log('created');
  },
  //在挂载开始之前被调用:相关的渲染函数首次被调用
  beforeMount : function(){
      console.log('beforeMount');

  },
  //el 被新创建的 vm.$el 替换, 挂在成功
  mounted : function(){
      console.log('mounted');

  },
  //数据更新时调用
  beforeUpdate : function(){
      console.log('beforeUpdate');

  },
  //组件 DOM 已经更新, 组件更新完毕
  updated : function(){
      console.log('updated');

  }
});
setTimeout(function(){
  vm.msg = "change ......";
}, 3000);
</script>
</body>
</html>
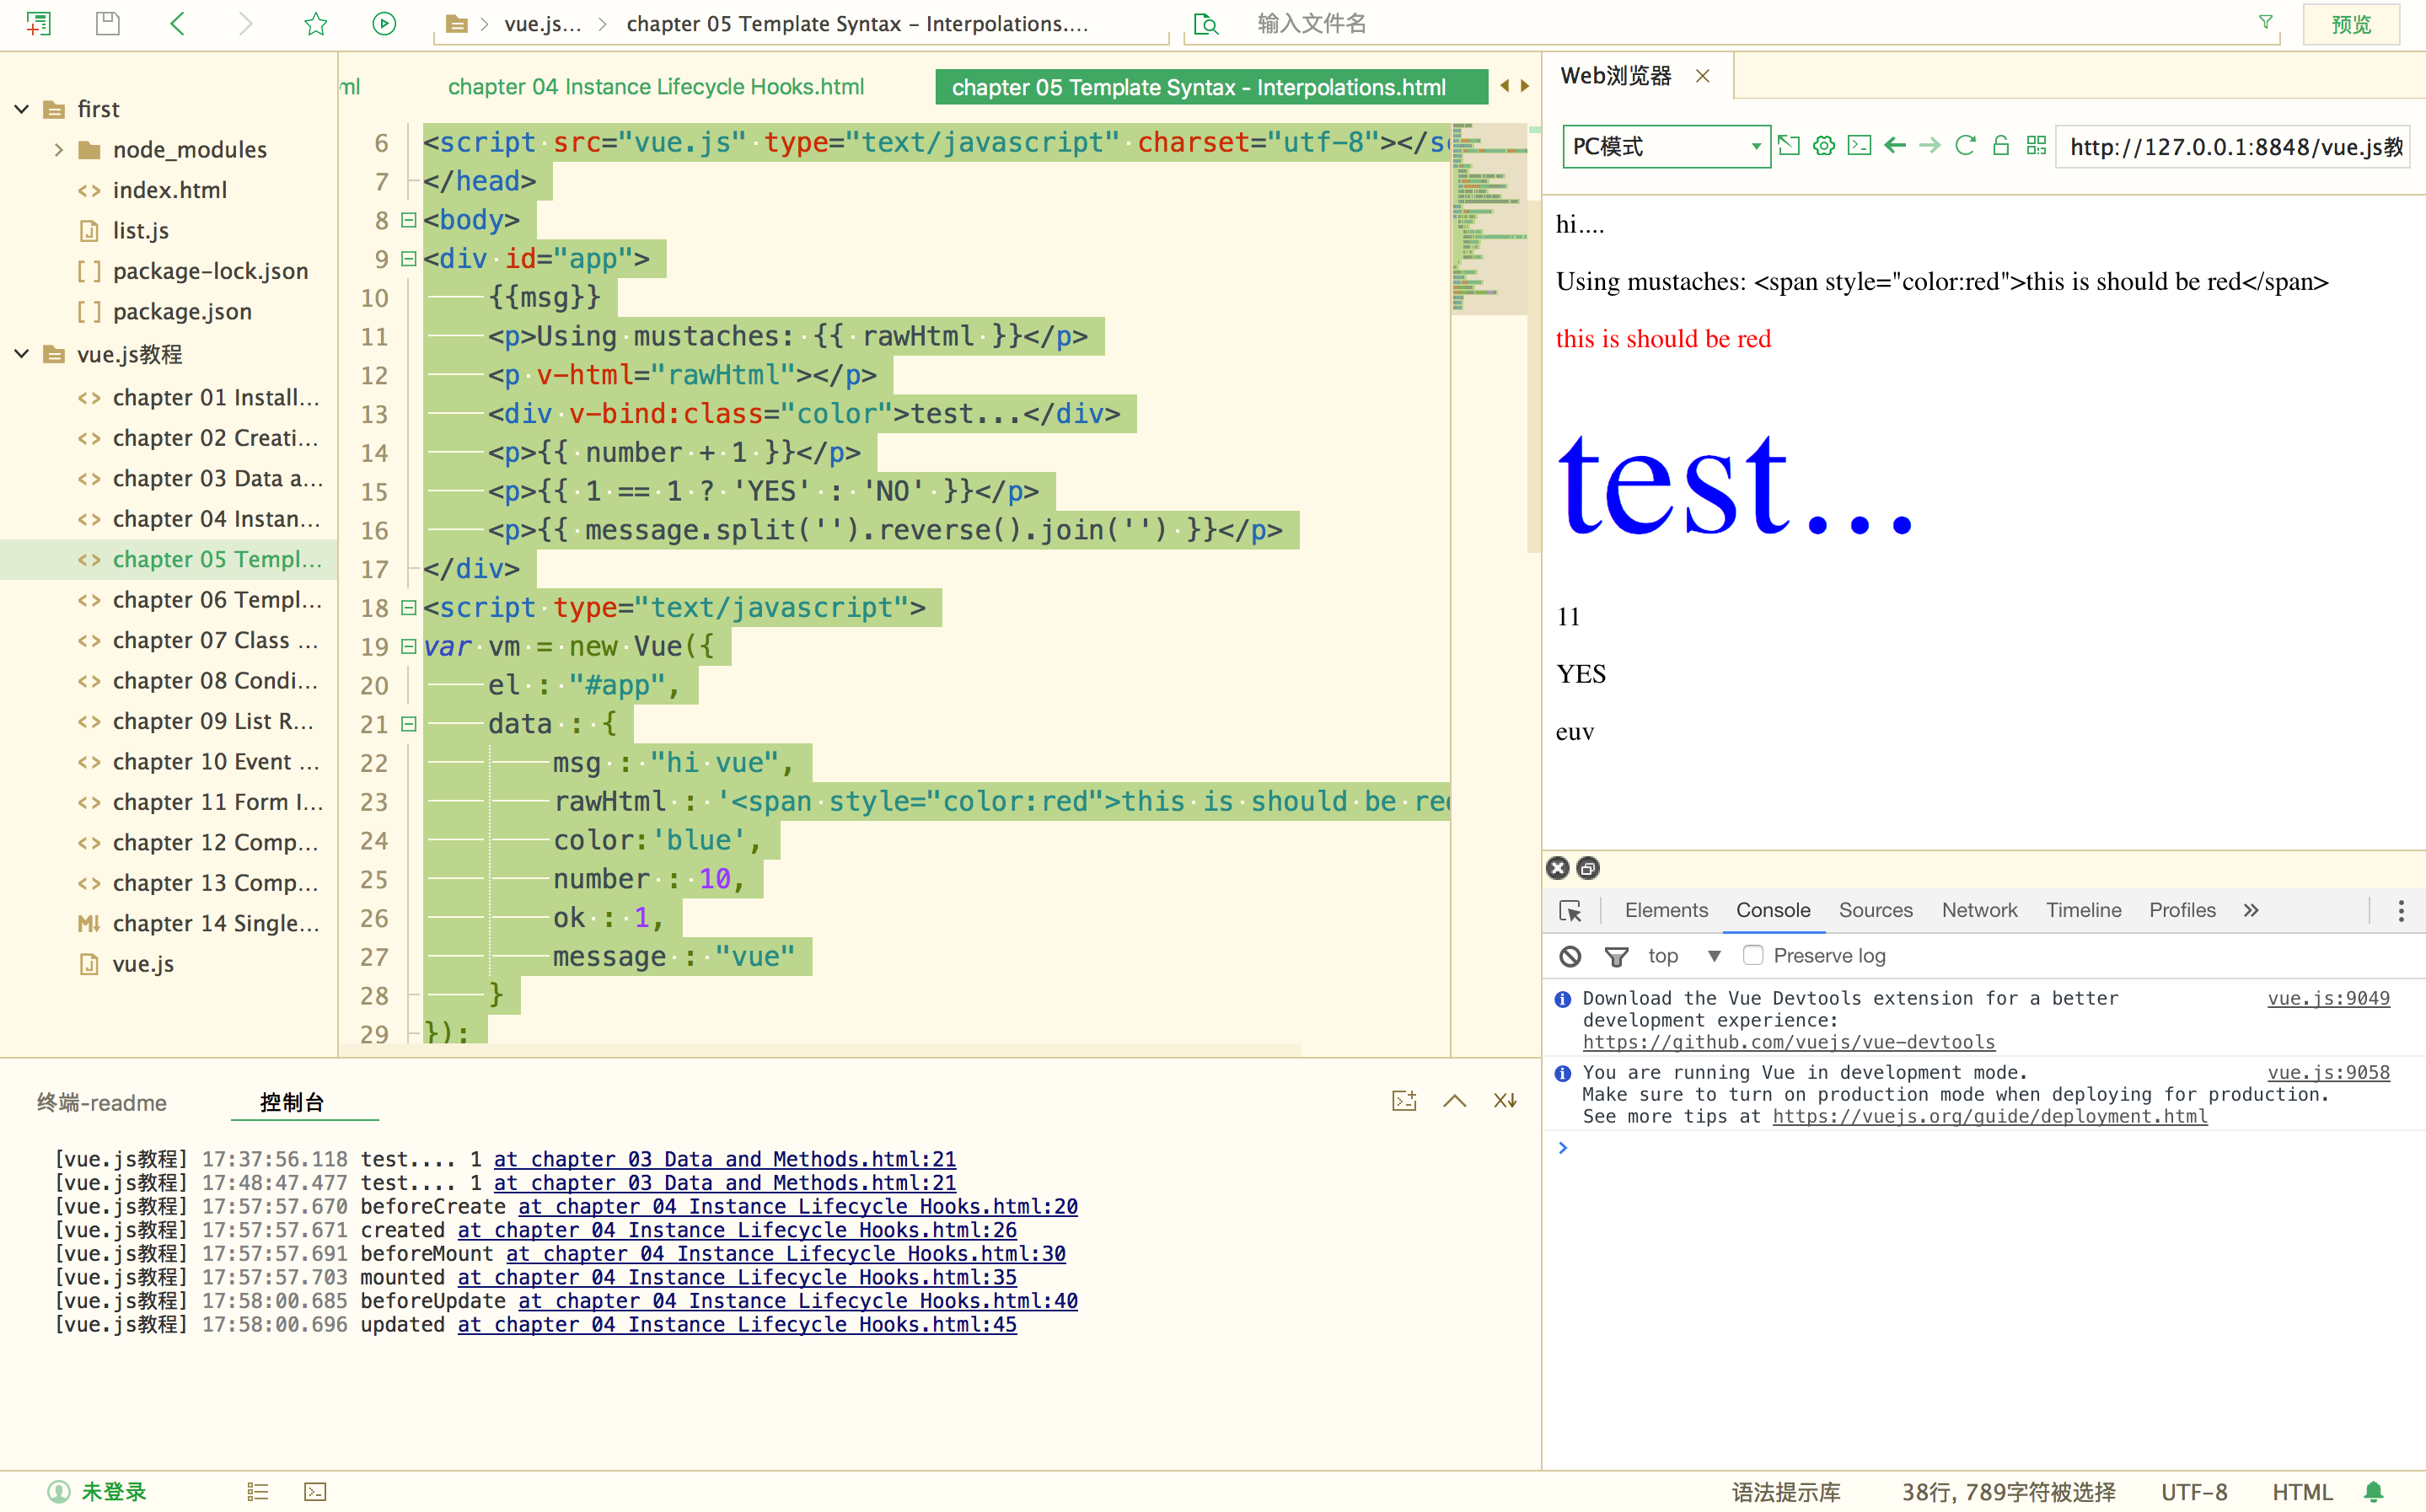
模板语法-插值
<!DOCTYPE html>
<html>
<head>
<meta charset="utf-8">
<title></title>
<script src="vue.js" type="text/javascript" charset="utf-8"></script>
</head>
<body>
<div id="app">
  {{msg}}
  <p>Using mustaches: {{ rawHtml }}</p>
  <p v-html="rawHtml"></p>
  <div v-bind:class="color">test...</div>
  <p>{{ number + 1 }}</p>
  <p>{{ 1 == 1 ? 'YES' : 'NO' }}</p>
  <p>{{ message.split('').reverse().join('') }}</p>
</div>
<script type="text/javascript">
var vm = new Vue({
  el : "#app",
  data : {
      msg : "hi vue",
      rawHtml : '<span style="color:red">this is should be red</span>',
      color:'blue',
      number : 10,
      ok : 1,
      message : "vue"
  }
});
vm.msg = "hi....";
</script>
<style type="text/css">
.red{color:red;}
.blue{color:blue; font-size:100px;}
</style>
</body>
</html>
模板属性-指令
v-bind 绑定的是属性, v-on 绑定的是事件
<! -- 动态参数 -->
<a v-bind:[attributeName]="url"> ... </a>
<a v-on:[eventName]="doSomething"> ... </a>
<-! Vue 实例有一个 data--></-!>
data : {
    attributeName:  "href",
    eventName: "click"
}
<!DOCTYPE html>
<html>
<head>
<meta charset="utf-8">
<title></title>
<script src="vue.js" type="text/javascript" charset="utf-8"></script>
</head>
<body>
<div id="app">
    <p v-if="seen">现在你看到我了</p>
    <a v-bind:href="url">...</a>
    <div @click="click1">
        <div @click.stop="click2">
            click me
        </div>
    </div>
</div>
<script type="text/javascript">
var vm = new Vue({
    el : "#app",
    data : {
        seen : false,
        url : "https://cn.vuejs.org/v2/guide/syntax.html#%E6%8C%87%E4%BB%A4"
    },
    methods:{
        click1 : function () {
            console.log('click1......');
        },
        click2 : function () {
            console.log('click2......');
        }
    }
});
</script>
<style type="text/css">

</style>
</body>
</html>
- 计算属性和侦听器
<div id="example">
  <p>Original message: "{{ message }}"</p>
  <p>Computed reversed message: "{{ reversedMessage }}"</p>
</div>
var vm = new Vue({
  el: '#example',
  data: {
    message: 'Hello'
  },
  computed: {
    // 计算属性的 getter
    reversedMessage: function () {
      // `this` 指向 vm 实例
      return this.message.split('').reverse().join('')
    }
  }
})
计算属性缓存 vs 方法
<p>Reversed message: "{{ reversedMessage() }}"</p>
// 在组件中
methods: {
  reversedMessage: function () {
    return this.message.split('').reverse().join('')
  }
}
我们可以将同一函数定义为一个方法而不是一个计算属性。两种方式的最终结果确实是完全相同的。然而,不同的是计算属性是基于它们的响应式依赖进行缓存的。只在相关响应式依赖发生改变时它们才会重新求值。这就意味着只要 message 还没有发生改变,多次访问 reversedMessage 计算属性会立即返回之前的计算结果,而不必再次执行函数。
这也同样意味着下面的计算属性将不再更新,因为 Date.now() 不是响应式依赖:
computed: {
  now: function () {
    return Date.now()
  }
}
计算属性和侦听器的对比
<div id="demo">{{ fullName }}</div>
var vm = new Vue({
  el: '#demo',
  data: {
    firstName: 'Foo',
    lastName: 'Bar',
    fullName: 'Foo Bar'
  },
  watch: {
    firstName: function (val) {
      this.fullName = val + ' ' + this.lastName
    },
    lastName: function (val) {
      this.fullName = this.firstName + ' ' + val
    }
  }
})
var vm = new Vue({
  el: '#demo',
  data: {
    firstName: 'Foo',
    lastName: 'Bar'
  },
  computed: {
    fullName: function () {
      return this.firstName + ' ' + this.lastName
    }
  }
})
- 计算属性的setter
// ...
computed: {
  fullName: {
    // getter
    get: function () {
      return this.firstName + ' ' + this.lastName
    },
    // setter
    set: function (newValue) {
      var names = newValue.split(' ')
      this.firstName = names[0]
      this.lastName = names[names.length - 1]
    }
  }
}
// ...
- 侦听器
当需要在数据变化时执行异步或开销较侦听器watch
<div id="watch-example">
  <p>
    Ask a yes/no question:
    <input v-model="question">
  </p>
  <p>{{ answer }}</p>
</div>
<!-- 因为 AJAX 库和通用工具的生态已经相当丰富,Vue 核心代码没有重复 -->
<!-- 提供这些功能以保持精简。这也可以让你自由选择自己更熟悉的工具。 -->
<script src="https://cdn.jsdelivr.net/npm/axios@0.12.0/dist/axios.min.js"></script>
<script src="https://cdn.jsdelivr.net/npm/lodash@4.13.1/lodash.min.js"></script>
<script>
var watchExampleVM = new Vue({
  el: '#watch-example',
  data: {
    question: '',
    answer: 'I cannot give you an answer until you ask a question!'
  },
  watch: {
    // 如果 `question` 发生改变,这个函数就会运行
    question: function (newQuestion, oldQuestion) {
      this.answer = 'Waiting for you to stop typing...'
      this.debouncedGetAnswer()
    }
  },
  created: function () {
    // `_.debounce` 是一个通过 Lodash 限制操作频率的函数。
    // 在这个例子中,我们希望限制访问 yesno.wtf/api 的频率
    // AJAX 请求直到用户输入完毕才会发出。想要了解更多关于
    // `_.debounce` 函数 (及其近亲 `_.throttle`) 的知识,
    // 请参考:https://lodash.com/docs#debounce
    this.debouncedGetAnswer = _.debounce(this.getAnswer, 500)
  },
  methods: {
    getAnswer: function () {
      if (this.question.indexOf('?') === -1) {
        this.answer = 'Questions usually contain a question mark. ;-)'
        return
      }
      this.answer = 'Thinking...'
      var vm = this
      axios.get('https://yesno.wtf/api')
        .then(function (response) {
          vm.answer = _.capitalize(response.data.answer)
        })
        .catch(function (error) {
          vm.answer = 'Error! Could not reach the API. ' + error
        })
    }
  }
})
</script>
- Class 与 Style 绑定
<!DOCTYPE html>
<html>
<head>
<meta charset="utf-8">
<title></title>
<script src="vue.js" type="text/javascript" charset="utf-8"></script>
</head>
<body>
<div id="app">
    <div
    class="test"
    v-bind:class="[ isActive ? 'active' : '', isGreen ? 'green' : '']"
    style="width:200px; height:200px; text-align:center; line-height:200px;">
        hi vue
    </div>

    <div
    :style="{color:color, fontSize:size, background: isRed ? '#FF0000' : ''}">
        hi vue
    </div>
</div>
<script type="text/javascript">
var vm = new Vue({
    el : "#app",
    data : {
        isActive : true,
        isGreen : true,
        color : "#FFFFFF",
        size : '50px',
        isRed : true
    }
});
</script>
<style>
.test{font-size:30px;}
.green{color:#00FF00;}
.active{background:#FF0000;}
</style>
</body>
</html>
<-! 如果isActive 的值为true 那么class 就是 active,如果为false 就是空;如果isGreen 的值为false 那么class就是green,如果为false 就是空--></-!>
v-bind:class="[ isActive ? 'active' : '', isGreen ? 'green' : '']"
<-! isRed 的值为true那么background 就是 #FF0000的颜色,如果是false 那么background 就是空--></-!>
:style="{color:color, fontSize:size, background: isRed ? '#FF0000' : ''}">
- 条件渲染
<!DOCTYPE html>
<html>
<head>
<meta charset="utf-8">
<title></title>
<script src="vue.js" type="text/javascript" charset="utf-8"></script>
</head>
<body>
<div id="app">
    <div v-if="type === 'A'">
      A
    </div>
    <div v-else-if="type === 'B'">
      B
    </div>
    <div v-else-if="type === 'C'">
      C
    </div>
    <div v-else>
      Not A/B/C
    </div>
    <h1 v-show="ok">Hello!</h1>
</div>
<script type="text/javascript">
var vm = new Vue({
    el : "#app",
    data : {
        type : "B",
        ok : false
    }
});
</script>
<style type="text/css">

</style>
</body>
</html>
<-! v-if 是真正意义的条件渲染,v-show 并不是,v-show 是会都渲染出来,只不过通过css样式,display 属性进行控制是否显示在页面></-!>
- 列表渲染
<!DOCTYPE html>
<html>
<head>
<meta charset="utf-8">
<title></title>
<script src="vue.js" type="text/javascript" charset="utf-8"></script>
</head>
<body>
<div id="app">
    <ul>
        <li v-for="item,index in items" :key="index">
        {{index}}{{ item.message }}
        </li>
    </ul>
    <ul>
        <li v-for="value, key in object" :key="key">
            {{key}} : {{ value }}
        </li>
    </ul>
</div>
<script type="text/javascript">
var vm = new Vue({
    el : "#app",
    data : {
        items : [
            { message: 'Bar' },
            { message: 'I Fly'},
            { message: 'Foo' },
        ],
        object: {
            message: 'hello, vue.js!',
            title: 'How to do lists in Vue',
            author: 'Jane Doe',
            publishedAt: '2016-04-10'
        }
    }
});
</script>
</body>
</html>
- 事件处理
<!DOCTYPE html>
<html>
<head>
<meta charset="utf-8">
<title></title>
<script src="vue.js" type="text/javascript" charset="utf-8"></script>
</head>
<body>
<div id="app">
    <div id="example-1">
        <button v-on:click="counter += 1"> 数值 :  {{ counter }} </button><br />
        <button v-on:dblclick="greet('abc', $event)">Greet</button>
    </div>
</div>
<script type="text/javascript">
var vm = new Vue({
    el : "#app",
    data : {
        counter: 0,
        name : "vue"
    },
    methods:{
        greet : function (str, e) {
            alert(str);
            console.log(e);
        }
    }
});
</script>
<style type="text/css">

</style>
</body>
</html>
Vue.js 为 v-on 提供了事件修饰符
<!-- 阻止单击事件继续传播 -->
<a v-on:click.stop="doThis"></a>

<!-- 提交事件不再重载页面 -->
<form v-on:submit.prevent="onSubmit"></form>

<!-- 修饰符可以串联 -->
<a v-on:click.stop.prevent="doThat"></a>

<!-- 只有修饰符 -->
<form v-on:submit.prevent></form>

<!-- 添加事件监听器时使用事件捕获模式 -->
<!-- 即内部元素触发的事件先在此处理,然后才交由内部元素进行处理 -->
<div v-on:click.capture="doThis">...</div>

<!-- 只当在 event.target 是当前元素自身时触发处理函数 -->
<!-- 即事件不是从内部元素触发的 -->
<div v-on:click.self="doThat">...</div>
- 表单输入绑定
<!DOCTYPE html>
<html>
<head>
<meta charset="utf-8">
<title></title>
<script src="vue.js" type="text/javascript" charset="utf-8"></script>
</head>
<body>
<div id="app">
    <div id="example-1">
        <input v-model="message" placeholder="edit me">
        <p>Message is: {{ message }}</p>
        <textarea v-model="message2" placeholder="add multiple lines"></textarea>
        <p style="white-space: pre-line;">{{ message2 }}</p>
        <br />

        <div style="margin-top:20px;">
            <input type="checkbox" id="jack" value="Jack" v-model="checkedNames">
            <label for="jack">Jack</label>
            <input type="checkbox" id="john" value="John" v-model="checkedNames">
            <label for="john">John</label>
            <input type="checkbox" id="mike" value="Mike" v-model="checkedNames">
            <label for="mike">Mike</label>
            <br>
            <span>Checked names: {{ checkedNames }}</span>
        </div>

        <div style="margin-top:20px;">
            <input type="radio" id="one" value="One" v-model="picked">
            <label for="one">One</label>
            <br>
            <input type="radio" id="two" value="Two" v-model="picked">
            <label for="two">Two</label>
            <br>
            <span>Picked: {{ picked }}</span>
        </div>
        <button type="button" @click="submit">提交</button>
    </div>

</div>
<script type="text/javascript">
var vm = new Vue({
    el : "#app",
    data : {
        message : "test",
        message2 :"hi",
        checkedNames : ['Jack', 'John'],
        picked : "Two"
    },
    methods: {
        submit : function () {
            var submitObj = {
                msg1 : this.message,
                msg2 : this.message2,
                chckname : this.checkedNames,
                pck : this.picked
            };
            console.log(submitObj);

        }
    }
});
</script>
<style type="text/css">

</style>
</body>
</html>