

# 安装celery
pip install celery
pip install eventlet
# eventlet - 具有WSGI支持的异步框架
# eventlet是python库函数,一个是处理和网络相关的,另一个可以通过协程实现并发
# 可以实现'并发'(绿色线程),非阻塞
# 对Python库函数改写,支持协程
#安装broker
可以选择RabbitMQ或者Redis,celery官方推荐的是用rabbitmq,不过我这里,两种broker 我都会安装
- redis 安装
# 下载编译
wget http://download.redis.io/releases/redis-4.0.11.tar.gz
tar zxf redis-4.0.11.tar.gz
cd redis-4.0.11
make
# 启动
 ./src/redis-server  redis.conf
 mac@1987demac redis-4.0.11 % netstat -na|grep 6379
tcp4       0      0  127.0.0.1.6379         *.*                    LISTEN
- rabbitmq安装
参考https://www.65535.fun/article/2020/7/4/88.html
```bash
# 同时安装 Celery 和 Redis 相关的依赖
pip install -U celery[redis]
创建一个tasks.py 文件
from celery import Celery
import time

app = Celery('tasks', broker='redis://127.0.0.1:6379/0',
             backend="redis://127.0.0.1:6379/0")


@app.task
def add(x, y):
    return x + y
创建一个需要执行的文件。T1.py
from common.tasks import add  # 这里导入的路劲要特别注意

if __name__ == '__main__':
    result = add.delay(12000003123, 123921839147)
    print(result.ready())
    time.sleep(10)
    while True:
        if result.ready():
            print(result.get(timeout=2))
            break
        else:
            print("It's not ready!")。
# cd 到common 这个app 的上一级目录
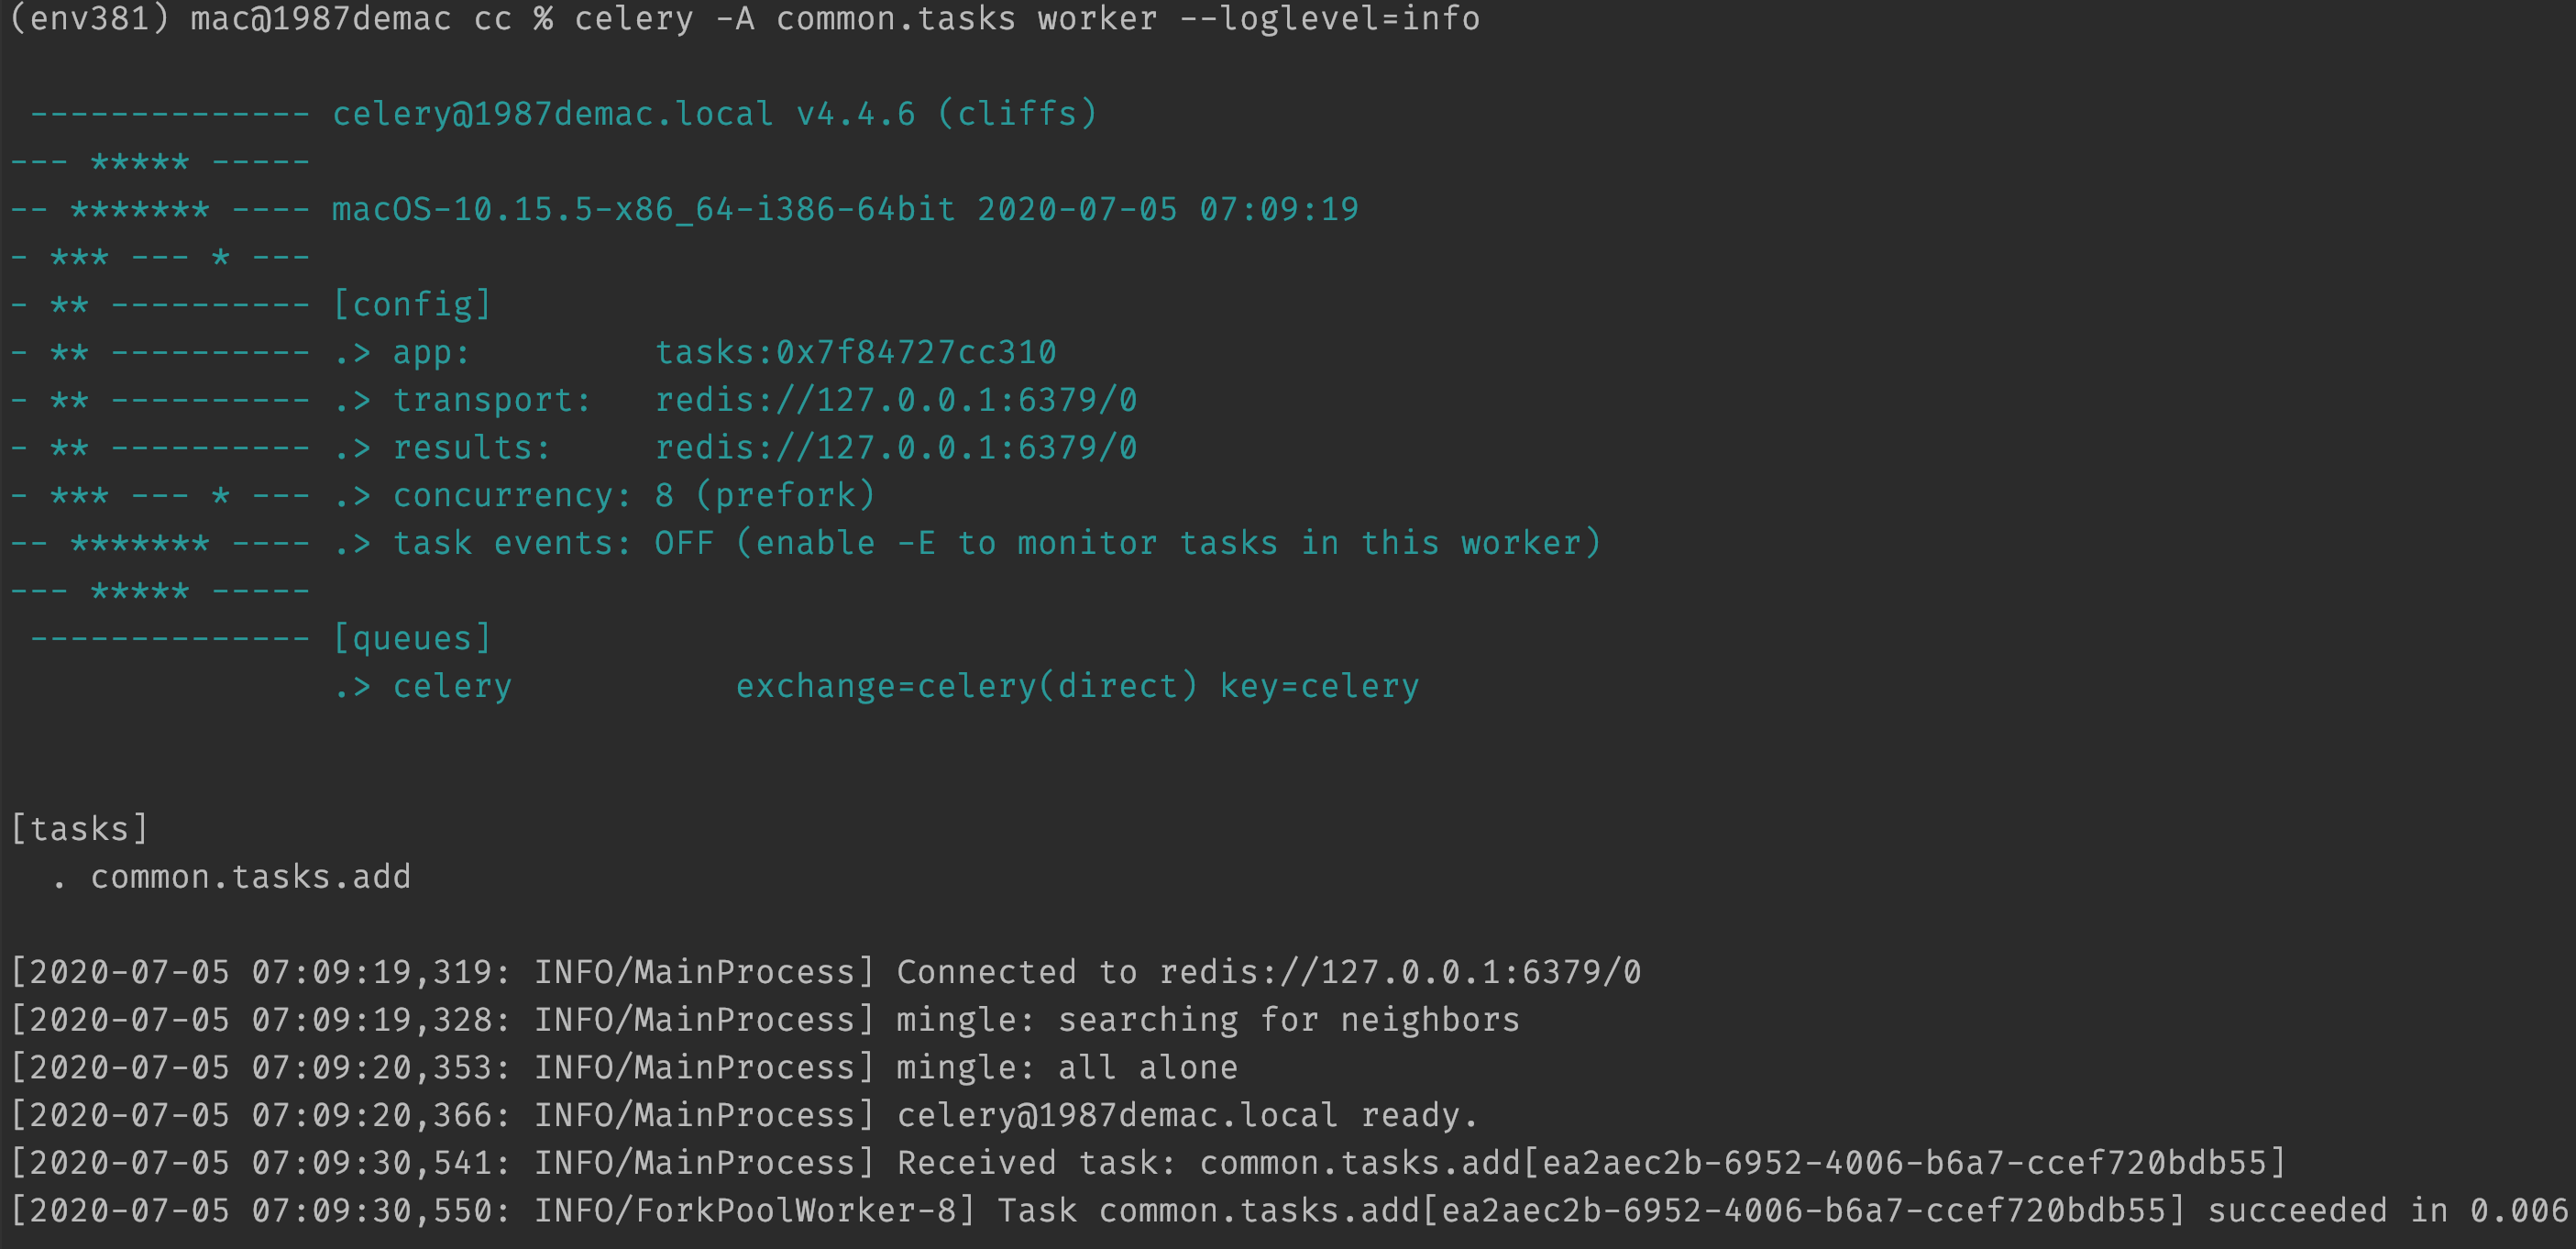
celery -A common.tasks worker --loglevel=info -P eventlet
# 这里的tasks 就是tasks.py 这个模块
如果客户端导入模块"common.tasks"作为".tasks",然后worker导入模块作为“common.tasks”,这样自动生成的名字就不能够正确匹配,worker就会抛出一个 NotRegistered,因此两边的名字要对应上。
celery -A common.tasks worker --loglevel=info
PyDev console: starting.

Python 3.8.1 (v3.8.1:1b293b6006, Dec 18 2019, 14:08:53)
>>> from common.tasks import add
>>> result = add.delay(100010, 200010)
>>> print(result)
2ab4f441-dfdb-4e27-a0b7-870e89953d33
>>> print(result.ready())
True
>>> print(result.get())
300020
# 配置
单个配置
app.conf.CELERY_TASK_SERIALIZER = 'json'
多个配置
app.conf.update(
    CELERY_TASK_SERIALIZER='json',
    CELERY_ACCEPT_CONTENT=['json'],  # Ignore other content
    CELERY_RESULT_SERIALIZER='json',
    CELERY_TIMEZONE='Europe/Oslo',
    CELERY_ENABLE_UTC=True,
)
大型项目你可以调用 config_from_object() 来让 Celery 实例加载配置模块
app.config_from_object('celeryconfig')
celeryconfig.py
BROKER_URL = 'amqp://'
CELERY_RESULT_BACKEND = 'amqp://'
CELERY_TASK_SERIALIZER = 'json'
CELERY_RESULT_SERIALIZER = 'json'
CELERY_ACCEPT_CONTENT=['json']
CELERY_TIMEZONE = 'Europe/Oslo'
CELERY_ENABLE_UTC = True
# 如何把“脏活”路由到专用的队列:
CELERY_ROUTES = {
    'tasks.add': 'low-priority',
}
# 限制任务的速率,这样每分钟只允许处理 10 个该类型的任务
CELERY_ANNOTATIONS = {
    'tasks.add': {'rate_limit': '10/m'}
}
如果你使用 RabbitMQ 或 Redis 作为中间人,那么你也可以在运行时直接在职程上设置速率限制:
celery control rate_limit tasks.add 10/m
worker@example.com: OK
    new rate limit set successfully
要验证你的配置文件可以正确工作,且不包含语法错误,你可以尝试导入它:
python -m celeryconfig
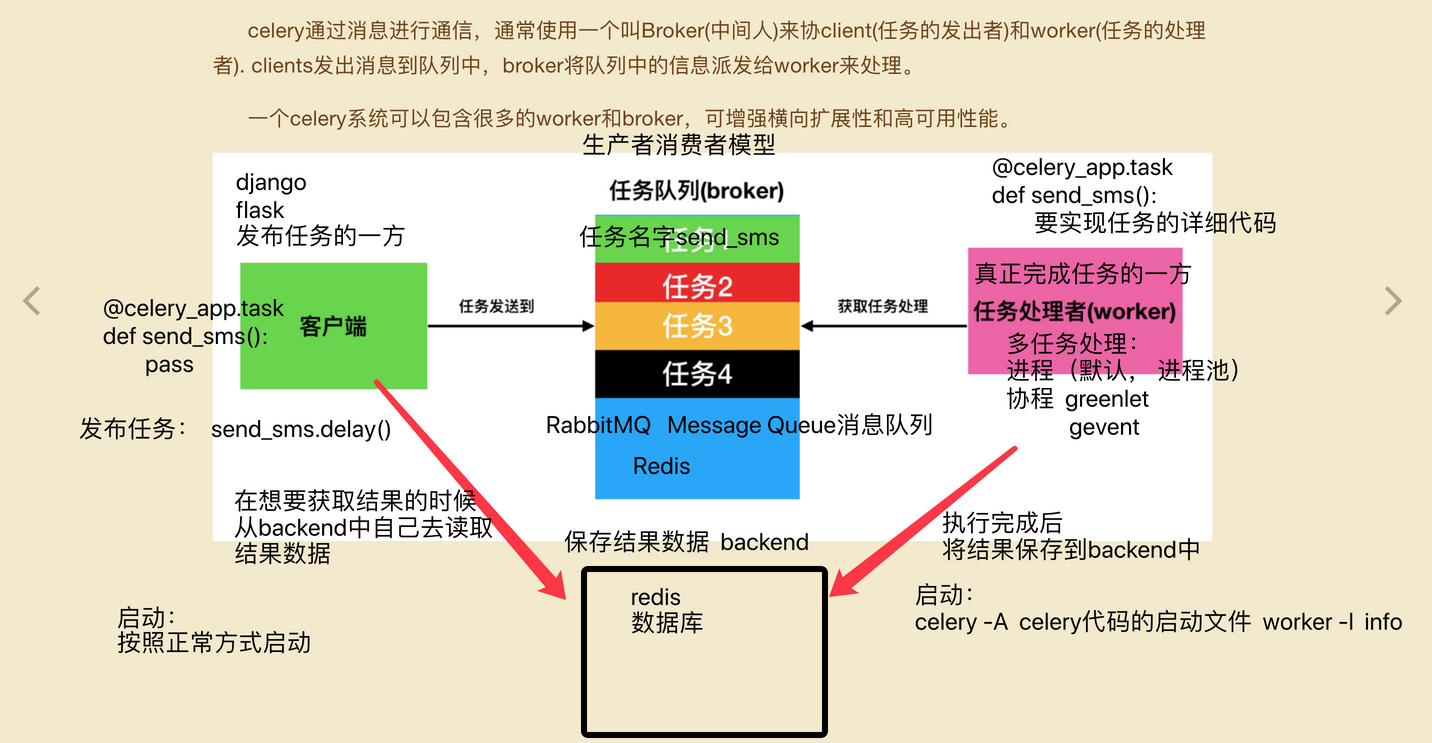
# celery 工作原理图
# 参考文档
Celery 官网:http://www.celeryproject.org/
Celery 官方文档英文版:http://docs.celeryproject.org/en/latest/index.html
Celery 官方文档中文版:http://docs.jinkan.org/docs/celery/
celery配置:http://docs.jinkan.org/docs/celery/configuration.html#configuration
参考:http://www.cnblogs.com/landpack/p/5564768.html http://blog.csdn.net/happyAnger6/article/details/51408266
http://www.cnblogs.com/forward-wang/p/5970806.html
分布式队列神器 Celery:https://segmentfault.com/a/1190000008022050
celery最佳实践:https://my.oschina.net/siddontang/blog/284107
Celery 分布式任务队列快速入门:http://www.cnblogs.com/alex3714/p/6351797.html
异步任务神器 Celery 快速入门教程:https://blog.csdn.net/chenqiuge1984/article/details/80127446
定时任务管理之python篇celery使用:http://student-lp.iteye.com/blog/2093397
异步任务神器 Celery:http://python.jobbole.com/87086/
celery任务调度框架实践:https://blog.csdn.net/qq_28921653/article/details/79555212
Celery-4.1 用户指南: Monitoring and Management Guide:https://blog.csdn.net/libing_thinking/article/details/78592801
Celery安装及使用:https://blog.csdn.net/u012325060/article/details/79292243
Celery学习笔记(一):https://blog.csdn.net/sdulsj/article/details/73741350